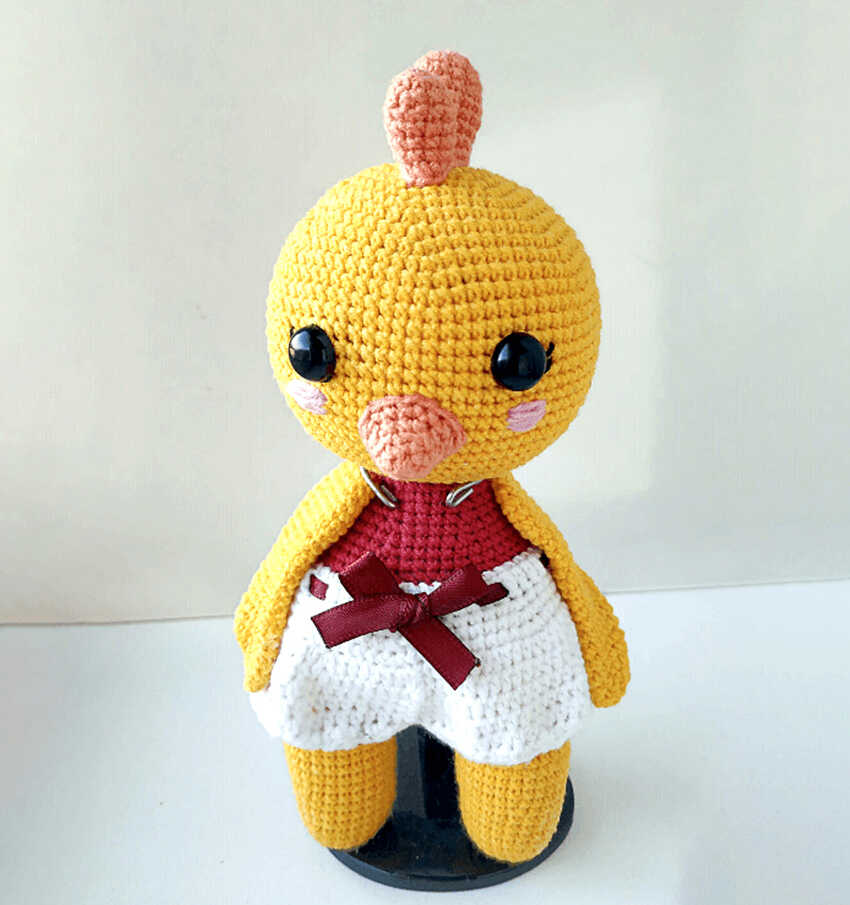
• Is worked by joining each rounds with a sl st. Make the shorts starting from top to bottom. Attach a white yarn at the front loop, last stitch of R33 of the body.
R1: Ch 1, SC 48, sl st. (48)
R2: Ch 2, DC 48, sl st. (48)
R3: Ch 1, (SC 7, INC) x 6, sl st. (54)
R4: Ch 1, (SC 8, INC) X 6, sl st. (60)
R5: Ch 1, (SC 9, INC) x 6, sl st. (66)
R6: Ch 2, (HDC 5, INC) x 11, sl st. (77)
R7: Ch 2, HDC in each st around, sl st. (77)
• Continue making right side of the shorts only
R8: Ch 7, skip 38 st, sl st to 39th st, ch 2 (HDC, DEC) x 15, HDC, sl st. (31) R9: Ch 2, (HDC, DEC) x 10, HDC. – FO
• Now to make the left side of the shorts.R1: Facing the back of the doll, attach a white yarn in the last st of R7, Ch 2, (HDC, DEC) x 15, HDC, sl st. (31) R2: Ch 2, (HDC, DEC) x 10, HDC. (21) – FO
Attack a white yarn at the front loop, last stitch of R33 of the body
Finishing of R1 SHORTS with a sl st.


Crocheting the legs of the SHORTS


- For left side of the shorts, ch 7.
2. Connect to the opposite side with a sl st.


3. Ch 2, Hdc in the same st.
4. To crochet the right side of the SHORTS, ch 2 in the last st of R7.
• Using a yarn needle, insert a red ribbon through R2 of the SHORTS. Tie a ribbon in the middle front.
• To prevent the ends from fraying, you can apply nail polish or apply heat (use a lighter) to melt the fibers together.
• To keep the ribbon in place, sew the back on to the SHORTS.


I looking for a totoro pattern. I saw one a few days ago but my phone died and I wasn’t able to save it.