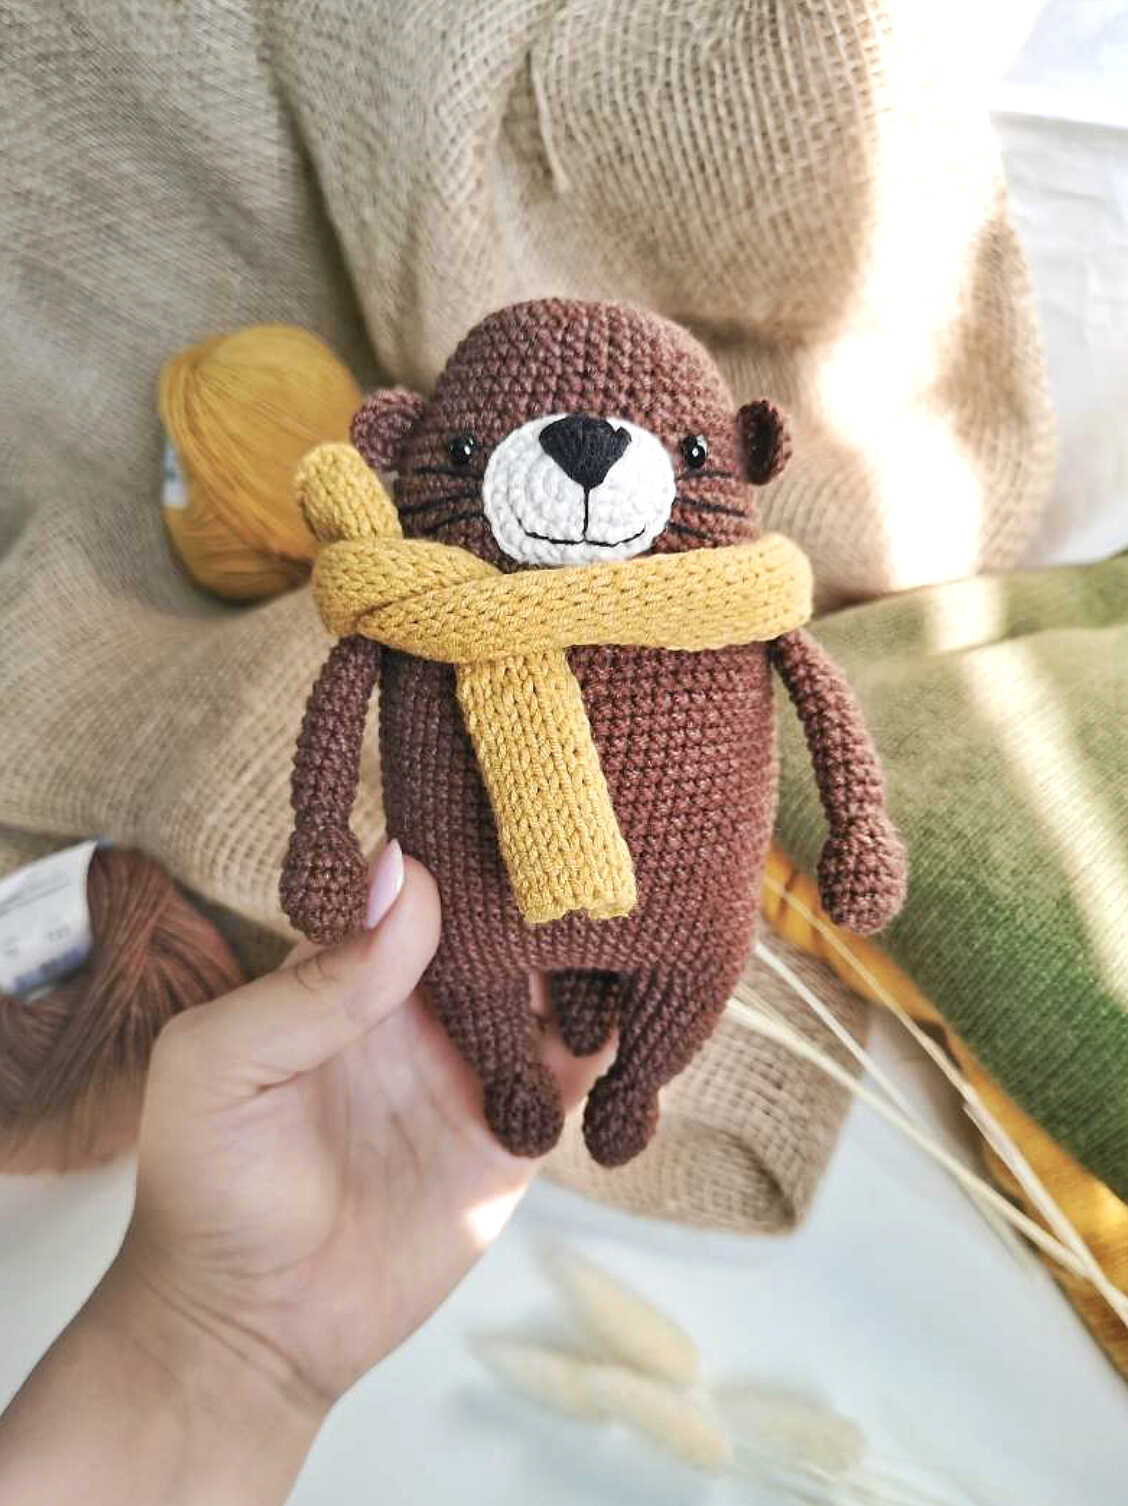
Knit with size 3 knitting needles, cast on 14 ch, then knit with the front stitch to the desired size. I got about 30 cm. If you do not know how to knit, it’s okay, you can crochet a scarf. To do this, dial 15 inc and in the second from the hook, start knitting sc to the end of the row. Then, in rotary rows, complete the entire fabric of the scarf of the required length.
Assembling
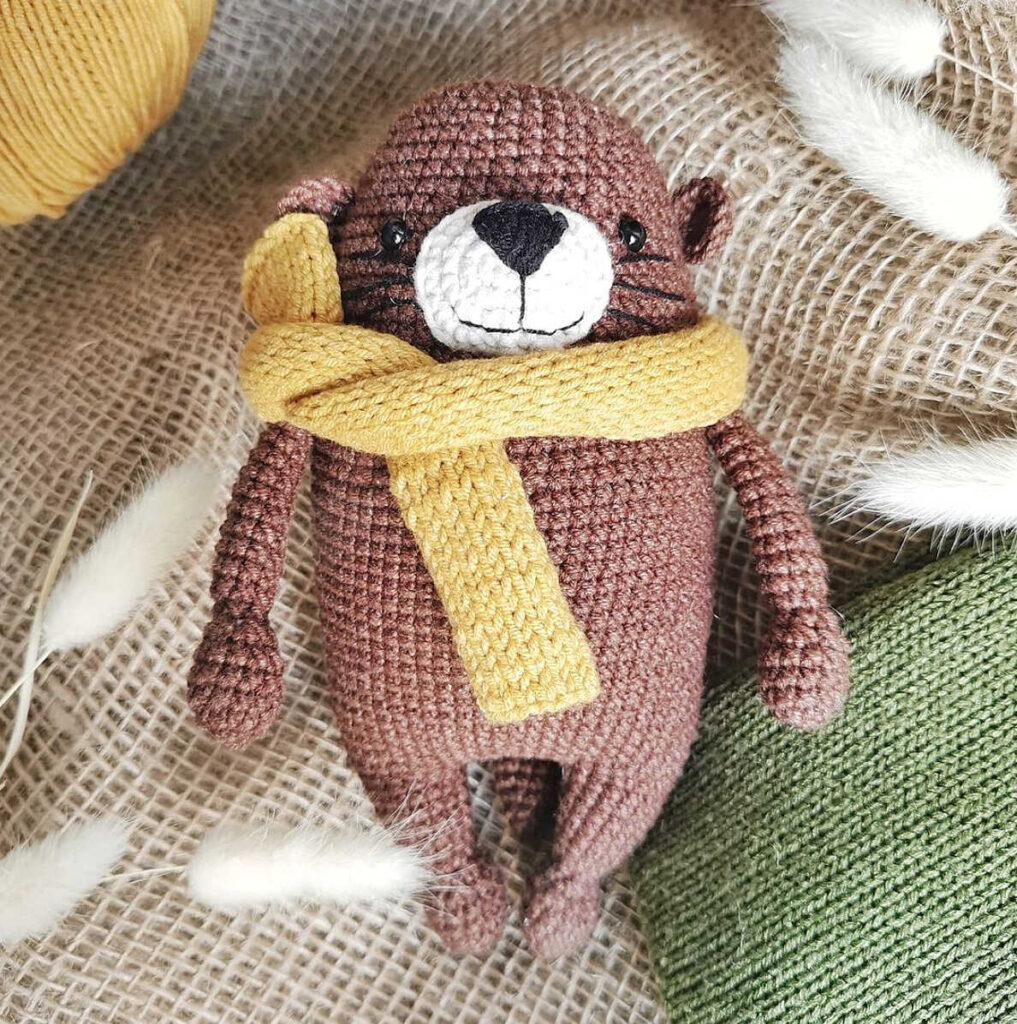
– Sew on handles between 24 and 26 rows of the body, at an angle. In order to do this as evenly and symmetrically as possible, first secure the handles with pins and only then sew with a thread.
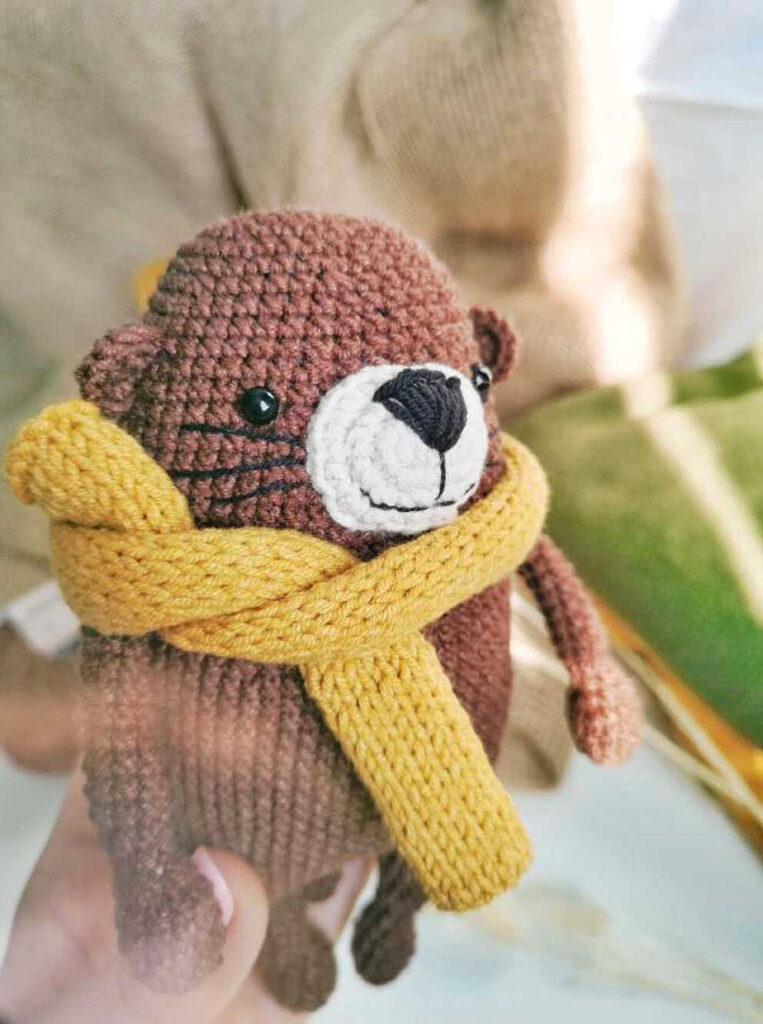
– Sew the muzzle between the eyes and fill it slightly so that it protrudes slightly forward. A nose is embroidered on the face, as shown in the photo. To decorate the mouth and mustache, I separate a thin thread from the main thick thread, and embroider the elements with it. This makes them more accurate and more consistent with the size of the toy.
Advice: do not try to sew everything exactly to the millimeter, in the case of amigurumi toys this is almost unrealistic, since the rows go in a spiral. And if my recommendations for the exact location of the parts of the toy go against your vision, then do as you see fit. After all, this is a creative process and each toy turns out to be unique.
– The ears should be located between 34 and 36 rows of the body, approximately at a distance of 6 single crochet from the peephole (we also first outline their position with pins). Sew the tail back between the 14th and 15th rows of the body.
It remains to knit a scarf and your Bruno is ready!
