We knit the second leg in the same way, but we do not cut the thread, but continue to knit. We collect 6 ch and connect the two legs together (knit the 1st column of the first row of the body into the first free ch on the second leg)

1. 15 sc on one leg, 6 sc on one side of the ch, 15 sc on the second leg, 6 sc on the other side of the ch (42)
Put the stamp on the last ch of this row, this will be the beginning of the next row.
2. (5 sc, 1 inc) × 7 (49)
3. (6 sc, 1 inc) × 7 (56)
4-9. 56 sc (56)
10. (7 sc, 1 inc) × 7 (63 )
11-21. 63 sc (63)
22. (7 sc, 1 dec) × 7 (56)
23-32. 56 sc (56)
33. (6 sc, 1 dec) × 7 (49)
34. 49 sc (49)
35. (5 sc, 1 dec) × 7 (42)
36-38. 42 sc (42)
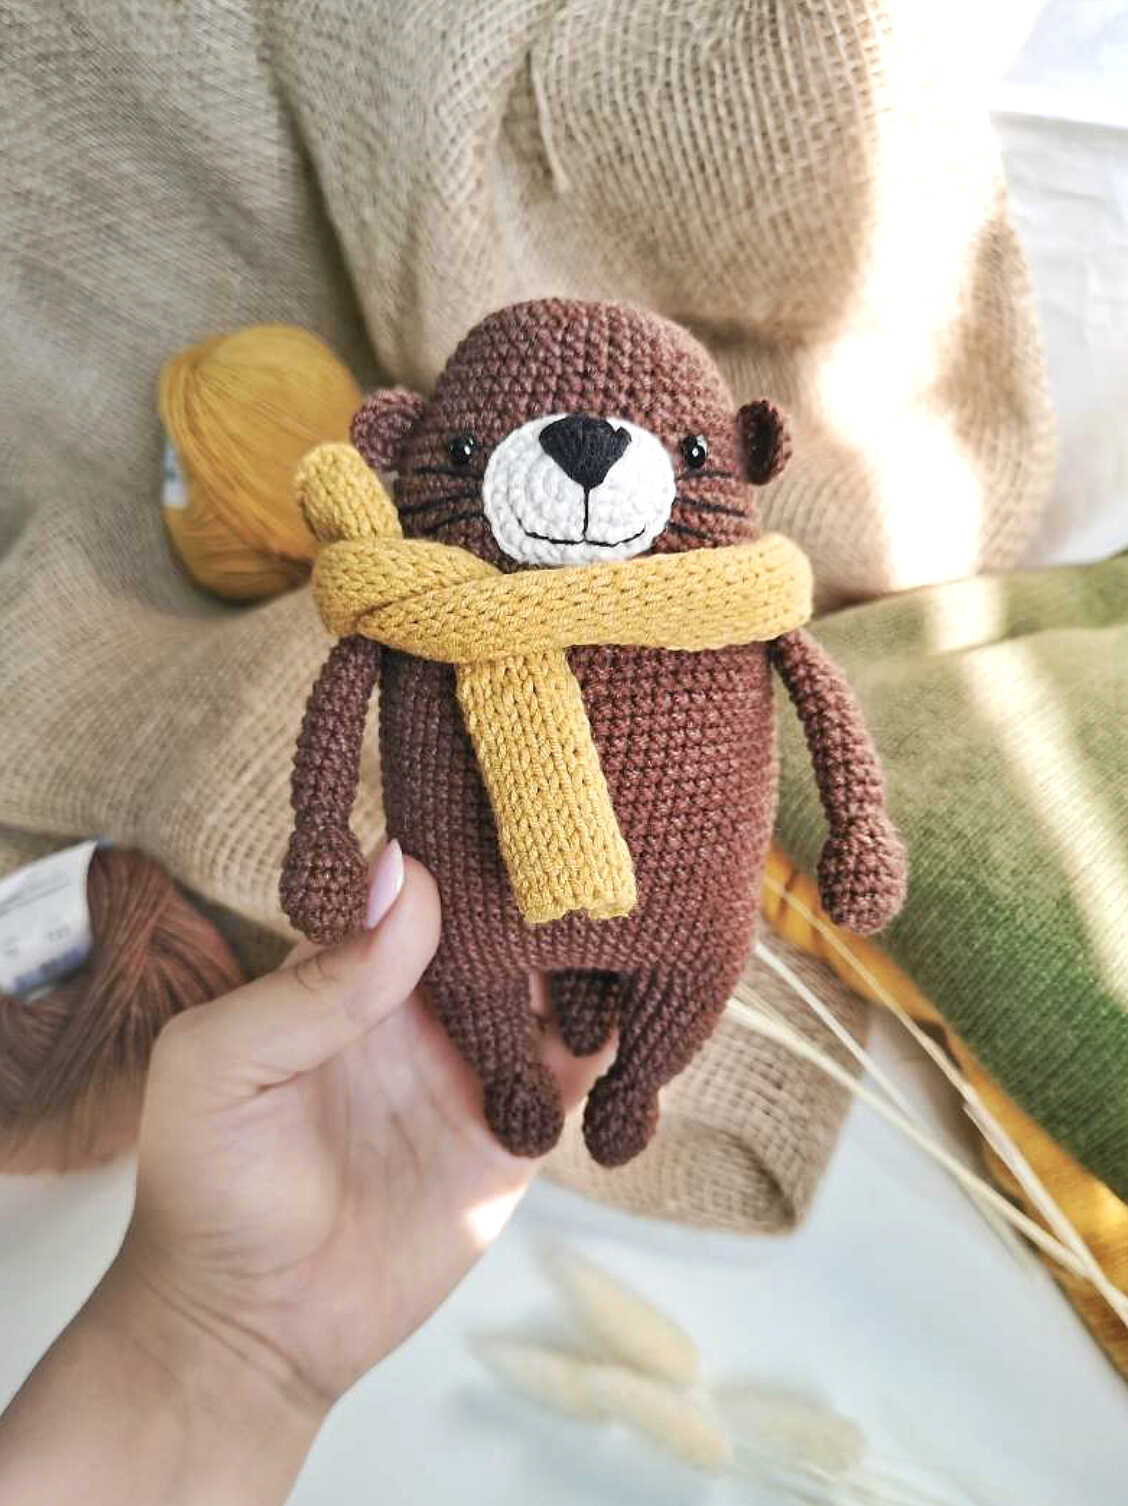
At this stage, we insert the eyes between 33 and 34 rows at a distance of about 10 columns from each other. Don’t forget to stuff the toy.
39. (4 sc, 1 dec) × 7 (35)
40-41. 35 sc (35)
42. (3 sc, 1 dec) × 7 (28)
43. (1 sc, 1 dec) × 9 (19)
44. 9 dec, 1 sc (10)
45. 5 dec (5)
Pull the knitting edges (you can see a convenient way in reels on my page) and hide the thread.
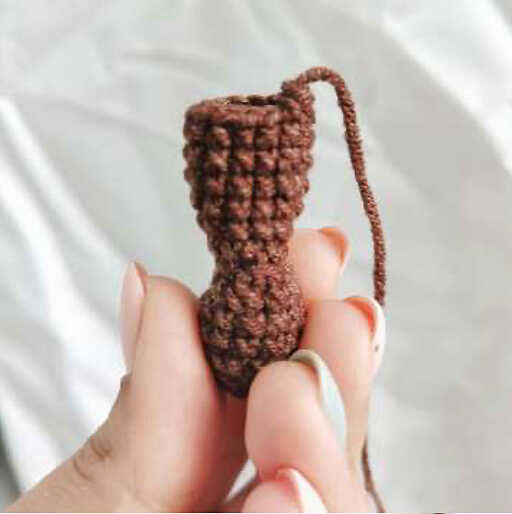
1. 6 sc in mr (6)
2. 6 inc (12)
3-5. 12 sc (12)
6. 6 dec (6)
7. 6 sc (6)
8. (1 sc, 1 inc) × 3 (9)
9-19. 9 sc (9)
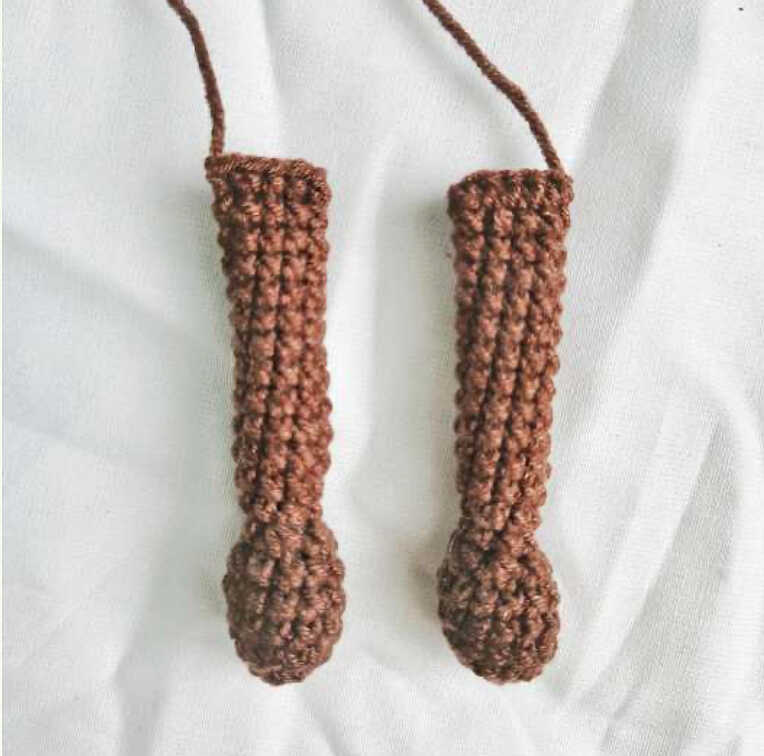
We fill the handles less than half, so that they do not puff up after sewing. We fold the handles in half and knit 4 sc for two walls, leave the thread for sewing.
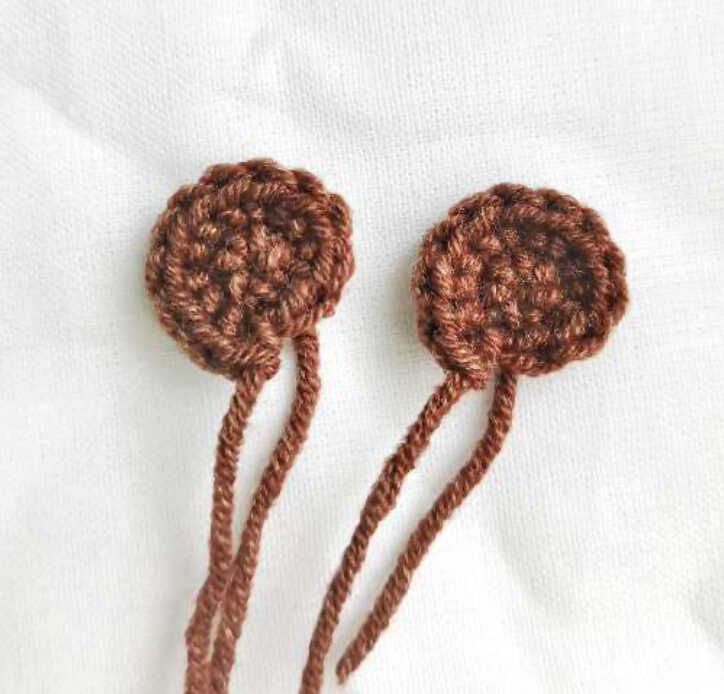
1. 6 sc in mr (6)
2. 6 inc (12)
Do not forget to leave the thread for sewing the ears to the head.
