Hi there...
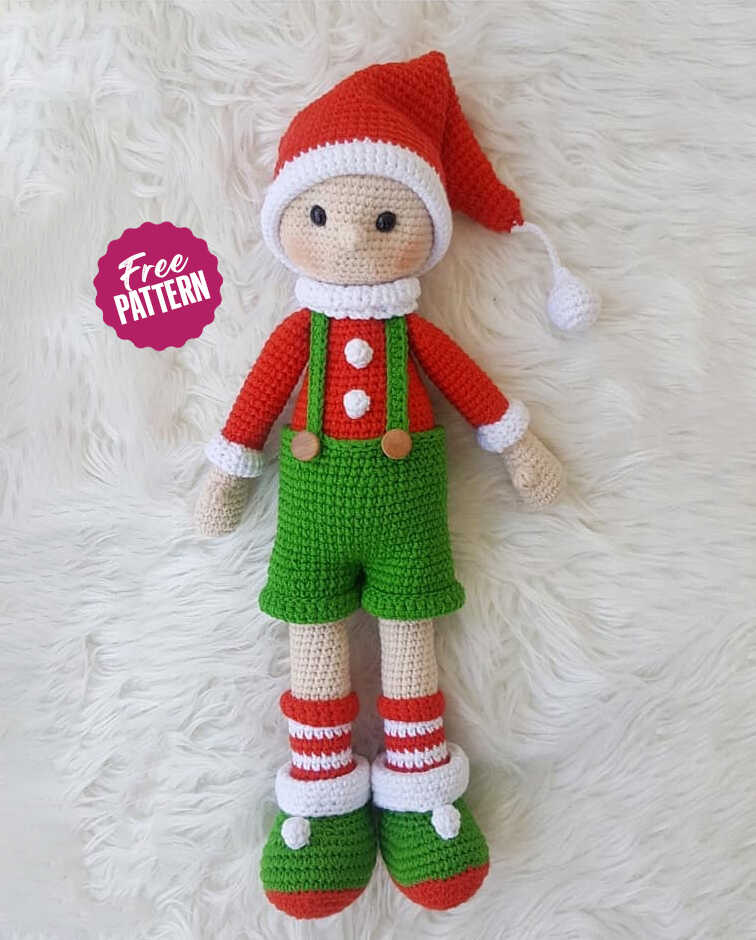
One of the free amigurumi crochet patterns we will share today is the amigurumi Elf. You can learn how to crochet these cute elf using the free amigurumi pattern.

Materials:
(This post contains affiliate links)
• About 50g each of Size 4 Worsted weight yarn in skin color, sweater color, stripe colors
• (I used Hobby Lobby’s I love this yarn for the project in colors ivory, key lime, red, white,and black)
• 12mm safety eyes
• Embroidery thread for eyebrows
• Stuffing
• E hook (3.25)
• H hook (5.0)
• Needle for sewing
• Stitch marker
• ¾ cup Poly pellets (these are used to weigh down the body so it can sit on the shelf)
The poly pellets are optional, but the do provide a lot of stability. I poured mine into mismatched socks and tied it up, like a bean bag. You can also use a sandwich bag or if you feel like your stitches are tight enough, just pour them into the body. I was more worried about my boys playing rough with them and the pellets working out, so I used the sock.
Say No to Wobbly Heads!
For this pattern, the legs, body and head are all one piece. That helps with the wobble, but there are few extra steps that make a big difference. First, make sure you are stuffing really well. You always need more than you think. Keep in mind that it will “deflate” for lack of a better term, over time. Make sure the body is packed, the neck is stuffed VERY well, and the head is too. On the other hand, if you over stuff the stitches will stretch and you can see the stuffing.
Obviously stop before you get to that point.
You can also add something to the neck. My newest and most favorite way is to use a foam hair roller. Yes, the kind that is used to curl hair! I get 6 for $1 at the Dollar Tree. They are the smaller, skinnier kind.Just stick them through the neck and stuff as well as you can around it. I needed to bend mine over because it was a little too big but it was no problem! This is by far the sturdiest I have ever seen my doll heads.
You can also crochet a tube. For this doll, because the neck is 12 stitches around, SC 11 in a magic circle. SC around until you reach about 20 rows (stuffing as you go) and then decrease and sew it shut. You will want to make sure that it is very firmly packed. Stuff it down the neck. Fill around with stuffing as well. (see I told you stuffing was important!)
Abbreviations
SC– single crochet
SC INC– single crochet increase (2 SC in each stitch)
INV DEC– Invisible decrease (put hook through the FRONT LOOP ONLY of two consecutive stitches [two loops on hook] Yarn over pull through both loops. [two loops on hook] Yarn over pull through two loops)
Magic Circle– Make a loop, leaving a long tail to work with. Insert hook in center of loop, yarn over and draw up a loop. Yarn over, pull through to make the first chain (this does not count as a stitch!). Continue to crochet over the loop and tail with the number of stitches called for. (If you need 6 SC, then crochet 6 SC inside the ring.) Pull the tail to close the circle.
Always move your stitch marker to the last stitch in the round. This pattern is worked in continuous rounds.
Everything but the scarf uses the E hook.
