– Make a total of 4 ears:
– 2 in the bunny’s main color
– 2 starting with pink, then switching to the main color
Solid Color Ears (Make 2)
1. Ch 9. Work around the chain.
2. Starting from the 2nd ch from the hook: sl st, 3 sc, 3 hdc, 5 hdc in last ch.
3. On the other side: 3 hdc, 3 sc, sl st (18)
4. Ch 3. Starting from the 2nd ch from the hook: 9 sc (2 sc in the chains, 7 in the stitches from previous row), 6 inc, 9 sc (33).
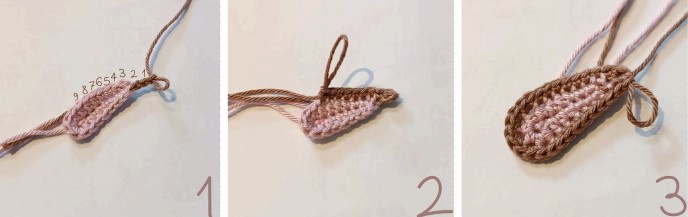
– Cut the yarn, leaving a long tail to hide later.
Pink Inner Ears (Make 2)
1. Ch 9. Work around the chain.
2. Starting from the 2nd ch from the hook: sl st, 3 sc, 3 hdc, 5 hdc in last ch.
3. On the other side: 3 hdc, 3 sc, sl st. (Switch to the main color here) (18)
4. Ch 3. Starting from the 2nd ch from the hook: 9 sc (2 sc in chains, 7 in stitches from previous row), 6 inc, 9 sc (33).
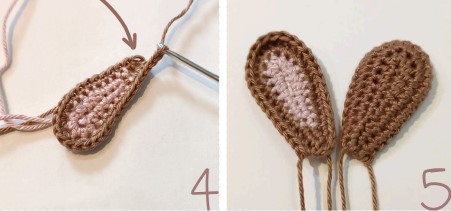
– Do not cut the yarn.
Joining the Ears
– Place one solid color ear and one pink-centered ear together with the right sides facing out.
– Ch 2, then crochet through both layers:
– Round 4: 13 sc, 4 hdc, 13 sc (30).
– Cut the yarn, leaving a long tail for sewing the ears onto the bunny’s head.
– Repeat for the second ear.
– Sew the ears onto the head between rounds 3-5.
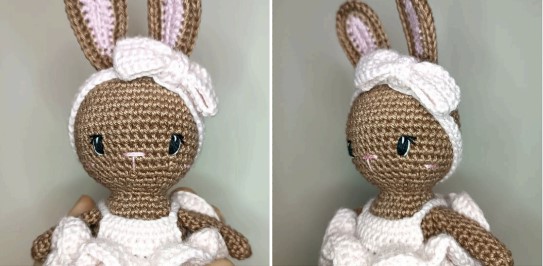
Face Embroidery
1. Nose:
– Embroider two horizontal lines with pink thread between rounds 16-17, spanning 3 stitches.
– Pull the vertical line down 2 stitches.
2. Eyes:
– Place them 3 stitches away from each side of the nose.
– Make vertical lines 2 stitches high.
– Add a white highlight with one vertical stitch from the top of the eye to the center.
3. Eyelashes:
– Add one horizontal and one diagonal stitch at the top of the eyes.
4. Cheeks:
– Embroider two horizontal pink lines 2 stitches wide, 3 stitches apart from the lower part of the eyes.