Designer: Sharon Ojala
Hi there...
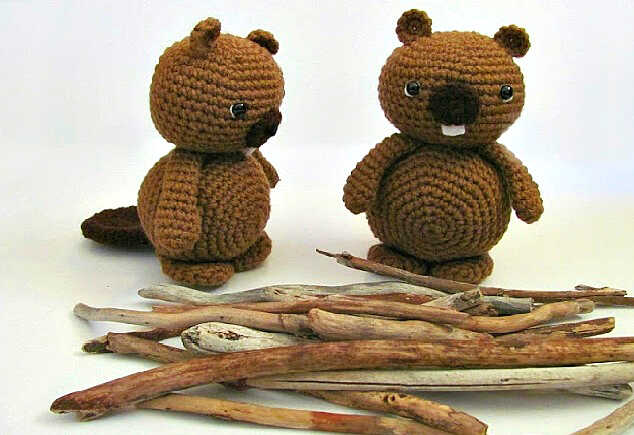
One of the free amigurumi crochet patterns we will share today is the amigurumi beaver. You can learn how to crochet these beaver using the free amigurumi pattern.

st = stitch
sc = single crochet
2tog = 2 stitches together
sl st = slip stitch
f/o = finish off
Supplies used:
light brown worsted weight medium #4
dark brown worsted weight medium #4
black sport weight yarn for the nose, you could also use worsted weight
small bits of white felt
hot glue
florist wire for tail – optional
black safety eyes 7.5mm but use any size you like
How to read the rows: Each row has a sequence as given below. For example 1sc then 2sc in next st means repeat that sequence 1sc then 2sc in next st followed by 1sc then 2sc in next st over and over to the end of that particular row. The number inside the parentheses ( ~ ) is the number of stitches you should have at the end of that particular row.
Add a marker at the end of row 2 and move that marker at the end of each row.
Muzzle
with Dark Brown
1) magic circle with 6sc(6)
2) 2sc in each st (12)
sl st next st and f/o
Using black yarn or thread, whip stitch the nose in.
Glue or sew a bit of white felt on for the teeth. I glued the piece onto the back of the muzzle and made sure some was exposed so that you could see the teeth when the muzzle was sewn in place. Shown below is the back of the muzzle.
Head
Remember if you use safety eyes to put them in before closing up the head. I used a small bit of white felt and hot glued them to the under side of the safety eyes to add some color. I placed the eyes in between the 10th and 11th row and they have 8st between them. I put the eyes in place when I finished the 15th row.
The nose was stitched onto the muzzle then the muzzle was sewn in when I finished the 17th row. This photo shows the muzzle sewn in. I would have preferred the muzzle just a bit higher than shown, but that is a matter of preference. Make sure you are happy with placements before permanently sewing the pieces in.
1) magic circle with 6sc (6)
2) 2sc in each st (12)
3) 1sc then 2sc in next st (18)
4) 1sc in next 2st then 2sc in next st (24)
5) 1sc in next 3st then 2sc in next st (30)
6) 1sc in next 4st then 2sc in next st (36)
7) 1sc in next 5st then 2sc in next st (42)
8-12) 1sc in each st for 5 rows
13) 1sc in next 5st then 2tog (36)
14-15) 1sc in each st for 2 rows
put in eyes
16) 1sc in next 4st then 2tog (30)
17) 1sc in each st
stitch nose on muzzle, glue on felt for the teeth then sew muzzle in place
18) 1sc in next 3st then 2tog (24)
19) 1sc in next 2st then 2tog (18)
f/o leaving a long tail for sewing
