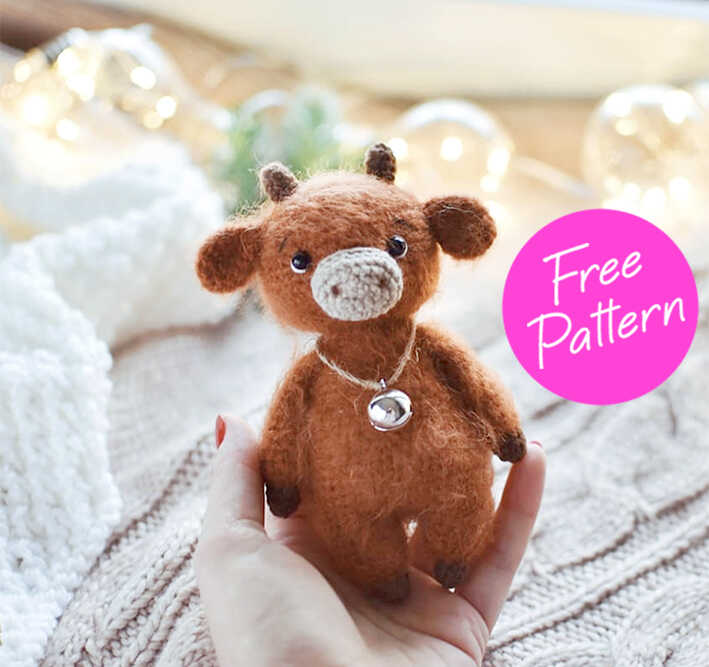
Start the design from the head. Determine muzzle location approximately between the 11th and 18th rows of the head, pin pins. Sew around, in progress sewing inside put the filler.
Make a tightening of the nostrils, focusing on a photo. To do this, mark the places with pins the location of the nostrils (stitch 1 and 2 in the photo), the distance between the stitch is approximately 3-4sc. Visually mark stitch 3 and 4 that located on 1sc to the sides of stitch 1 and 2 respectively.
Through the base of the head, insert a long needle with a thread and bring it out at stitch 1.
Then insert the needle at stitch 3 and bring it out to the base of the head.
Do the same tightening the second nostril, but in this case, remove the needle from the base of the head at the stitch 2.
Then insert the needle at stitch 4 and bring it back to the base. Pull the ends and tie a knot. The nostrils can be slightly toned (I made it colored pencil).
Mark with pins the location of the peephole, they are located between 11 and 12 rows of the head, the distance between the stitch is 8 sc. Like the nostrils do eyeliner.
In the places of the tightening, sew on the eyes – beads. With white thread, stitch around peephole to make them look more “alive”. Embroider the brows with black thread.
Fold the base of the eyelet in half and sew with a few stitches as shown. a photo. With pins, mark the location of the ears, sew at the level of the 9th row heads. Sew the horns symmetrically between the ears.
Pin the head to the body with pins, firmly sew in a circle, and when it remains small hole – add more filler between the head and neck, then sew to the end. symmetrical on the sides sew the handles away from the top edge of the body 1-2 rows.
For the ponytail at the back, attach the thread and tie a chain of 7 ch, fasten, tip comb. The toy itself can also be completely comb lightly with a slicker.
