
Designer: Victoria Samborskaya
Hi there...
One of the free amigurumi crochet patterns we will share today is the amigurumi monkey, whose photos and design belong to Victoria Samborskaya (@wikki_toys). You can learn how to crochet these little monkey using the free amigurumi pattern. Thanks to Victoria Samborskayafor this monkey.
Materials:
1. The yarn of two colors, in my case it is brown and light yellow and a little more pink for a bow (Kartopu Kristal)
2. Hook number 2, a needle for stitching parts, scissors.
3. Filler, in my case – holofiber.
4. Beads for the eye.
5. I also used wire for legs, pens and a ponytail, but this is not necessary.
Abbreviations:
sc – single crochet
ch – air loop
inc – increase (2 columns in one base loop)
dec – decrease (skip 1 loop or knit 2 together)
I want to warn you right away that I knit like this: I close each row and start with a loop lifting, so that the product does not move and looks even, especially if knit in different colors. In this case, only a faint, so to speak, shovchik is formed.
This toy is tied to the wrong side.
So, let’s start knitting our monkey
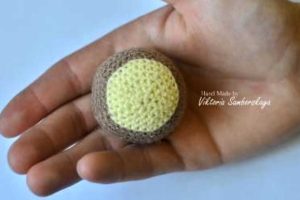
Head
Start in light yellow
R1: 6 sc into the amigurumi ring
R2: increase in each loop previous row (12)
R3: (1 sc, inc) * 6 (18)
R4: (2 sc, inc) * 6 (24)
R5: (3 sc, inc) * 6 (30)
Cut the thread. Take the brown yarn.
R6: Knit for the front wall of the row, so how the toy will be inside out: (4 sc, inc) * 6 (36)
R7: (5 sc, inc) * 6 (42)
R8-11: no change (42)
R12: (dec, 5 sc) * 6 (36)
R13: (dec, 4 sc) * 6 (30)
R14: (dec, 3 sc) * 6 (24)
R15: (dec, 2 sc) * 6 (18)
R16: (dec, 1 sc) * 6 (12)
Stuff the head with filler, tight
R17: decrease before closing (6)
Cut the thread, tighten the hole.
